 |
| Digging the Middle Row |
 |
| Seeding the Middle Row |
 |
| Covering the seed...six more rows to go! |
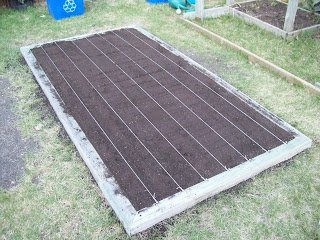
Once all seven rows were planted we added one more wheelbarrow full of soil to the top, since we expect the whole field might compact and sink a bit anyways.
Since we wanted to know where the wheat was under the ground, the last step for our seeding was to mark each row using a bit of string and a couple of roofing nails. It will be interesting to see if the wheat emerges where we expect it to pop up.
Now we wait for rain. The good news: this field is so small that we can water it or protect it if we need to. Rain is supposed to be on the way anyhow. To figure out how to get this far we watched a few YouTube videos that were helpful. Here are the links:
From Seed to Loaf (Part 1)
From Seed to Loaf (Part 2)
Wheat School: Evaluating Wheat Varieties
The Seed to Loaf videos are going to be very helpful as we move forward through the steps. The seeding rate recommended in the Seed to Loaf video is 15-20g of seed per m2. 32 s.f. is about 3 m2, so really we should have only used about 60 grams of seed in our little field. We ended up sowing about 207g of seed! We really over-did it...hopefully we can thin the rows once the plants emerge.
As we go we are getting advice from farmers that we know locally, but we are also looking for any help that any of you may be able to provide. Please feel free to post a comment to the blog if you have some ideas about our next steps. Right now we are trying to figure out how long it will take for us to see the first leaf. We have found the Feekes Scale but we are not sure if it will apply for us, given how we have planted. Time will tell! It feels good to get to this point though. Hopefully the over-seeding won't be too much of a problem. Grow Wheat Grow!
That is all we know so far.


What a great experiment to do with your family. Way to go! I'll look forward to following your progress.
ReplyDelete